
Here is a little tip on making a realistic snow base for model displays. I wanted to display one of my model aircraft that was equipped with snow skis on a snow base. I started with a round base and created the snow base using spackle. I used the DAP “Drydex”. When applied it has a pink hue and dries white. This helps the process as some of the thicker areas take time to fully dry. I applied it with a wide stick and used it to shape the areas where the wheels and skis. I created the drifts and where the snow piled up on the side and front of the skis. Since I was depicting the crew after they left the aircraft I made the sled tracks and used a 1/48 extra figure to create the footsteps of the crew. With the base completely dry I sprayed some white primer on it to seal it.


I then purchase a product made by Scene-A-Rama called “Winter Effects” This kit supplies you with fake snow and some clear acrylic gel to make ice. The snow is a flaky soft plastic. While it looks good right out of the box it does not have the glistening effect that snow has. In order to replicate the glistening I bought some Pearl Ex powdered pigments. This is a pearlized pigment that glistens in the light and has varying hues. I chose the Interference Blue color. I then added it to the snow in a 50/50 mix and stirred them together. This made the snow more realistic looking.


The next step was to paint the acrylic gel with a wide brush on the base. The snow was then sprinkled on top of the wet acrylic gel. The kit gives you a plastic container with holes on top so it is easy to control how much goes on top. I used the brush with acrylic gel to also build up the drifts and blend them a little better so the drifts look like they are formed by the wind.
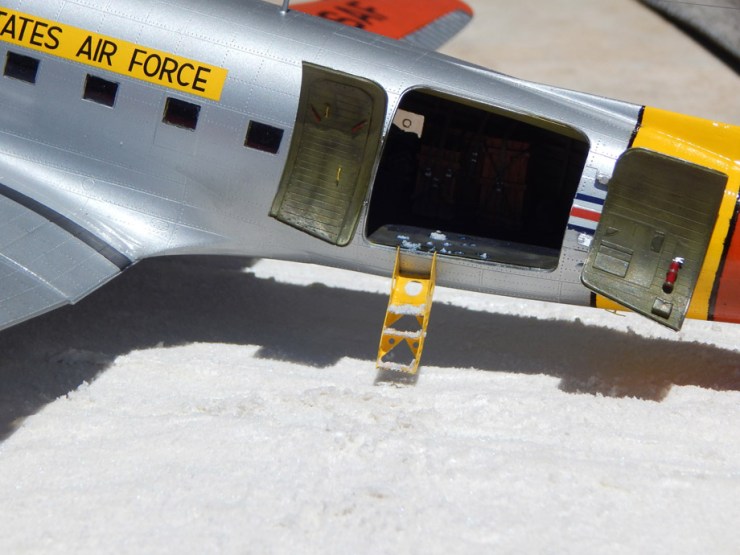
I let the base sit overnight to completely cure. I then misted a clear gloss spray over the surface to seal the snow and to add some more shine to the snow. I then mounted the aircraft to the base. I then used a medium brush that was dipped in the acrylic gel and then the snow. I used this to add snow on the tires, the sides and top of the skis, and on the aircraft boarding ladder and a little inside the cabin.


The snow effect gives a very realistic appearance to the display. The glisten effect adds to the realism of the scene. Thank you for checking out this interesting tip. Happy Modeling!